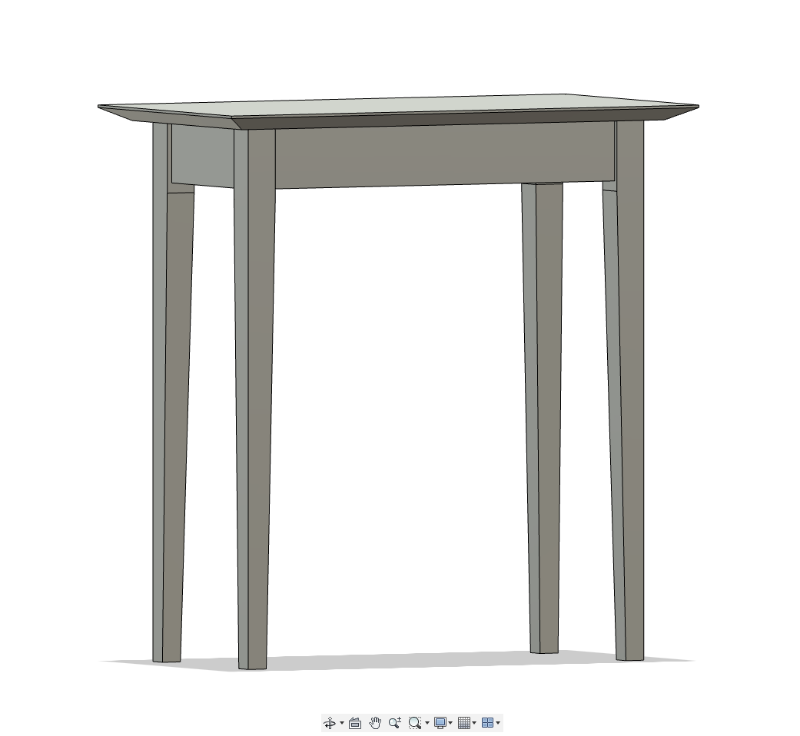
In this episode, we make a simple Shaker-inspired side table that can easily be manipulated into just about any size table you need.
Parameters used in this tutorial:
Key commands used in this tutorial:
|
Step by step:
These instructions assume you’ve followed along with the other videos up until now. If you don’t know how to input parameters or to create the following sketch you should probably go back to an earlier tutorial.
Starting with the parameters input, create the sketch
1. Create a construction rectangle that is Height X Width. Create a centerline inside that rectangle.
creating-parametric-mortising-template-fusion-360 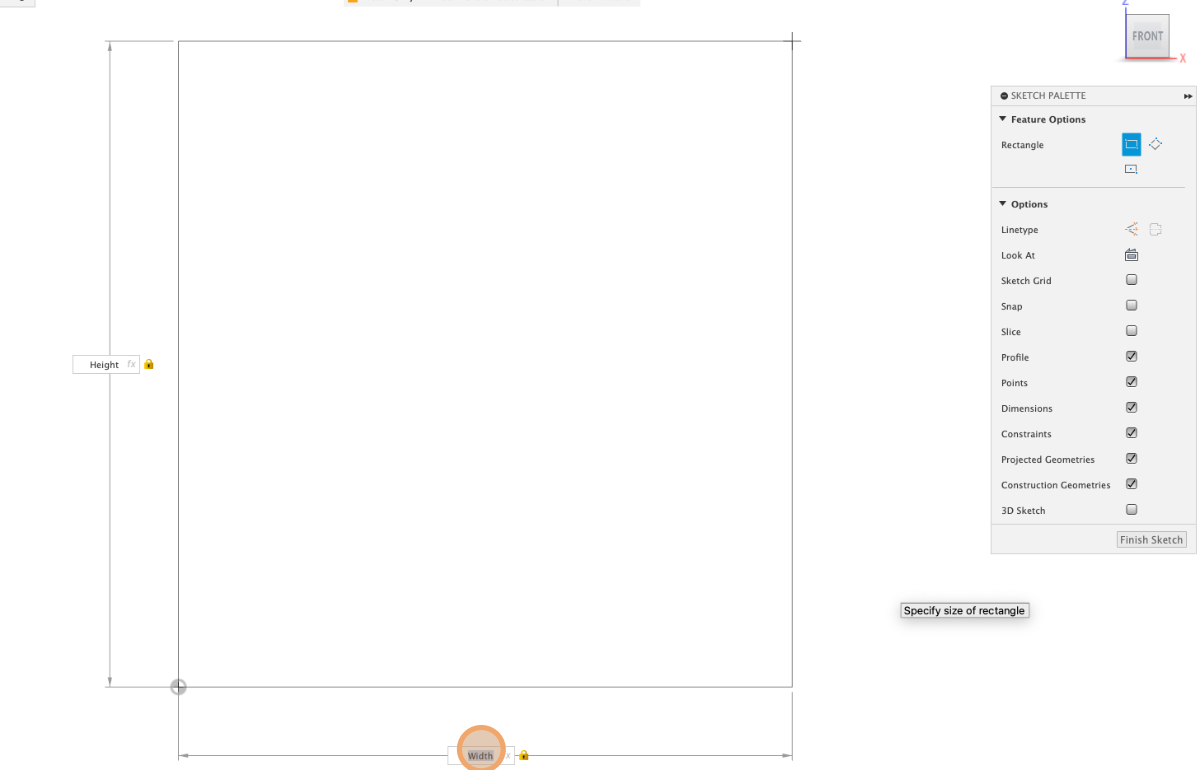
2. Fill in the rest of the sketch.
• Draw in the top and constrain it
• Draw in the left leg and constrain it
• Mirror the left leg
• Add the apron
• Add the taper to the left leg and constrain it
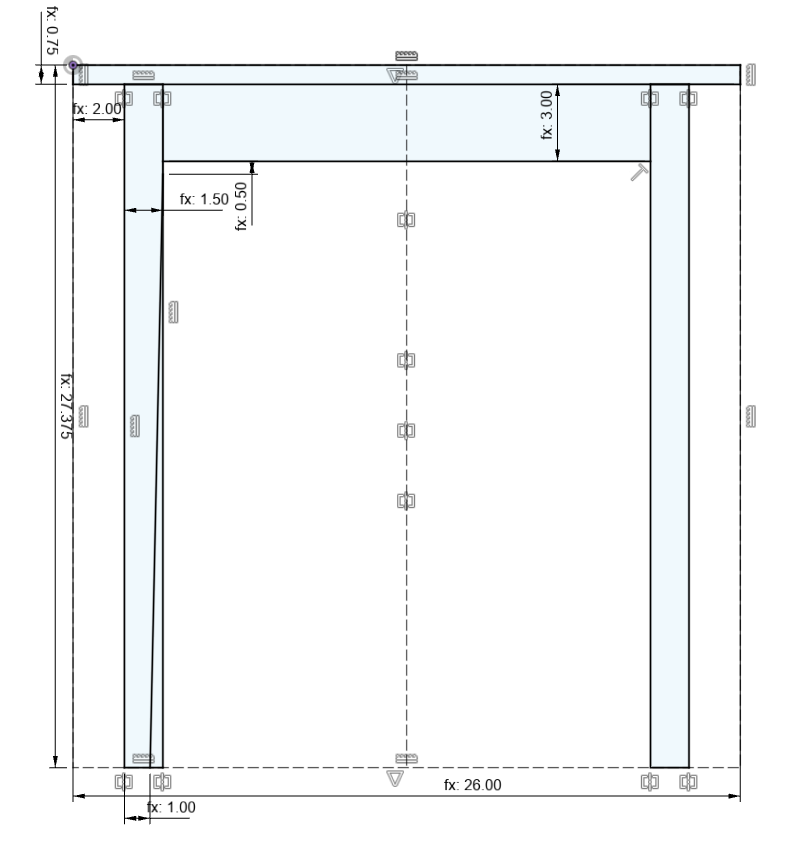
Creating the tapered leg
3. Extrude out the entire rectangle for the leg ‘LegThickness’ deep
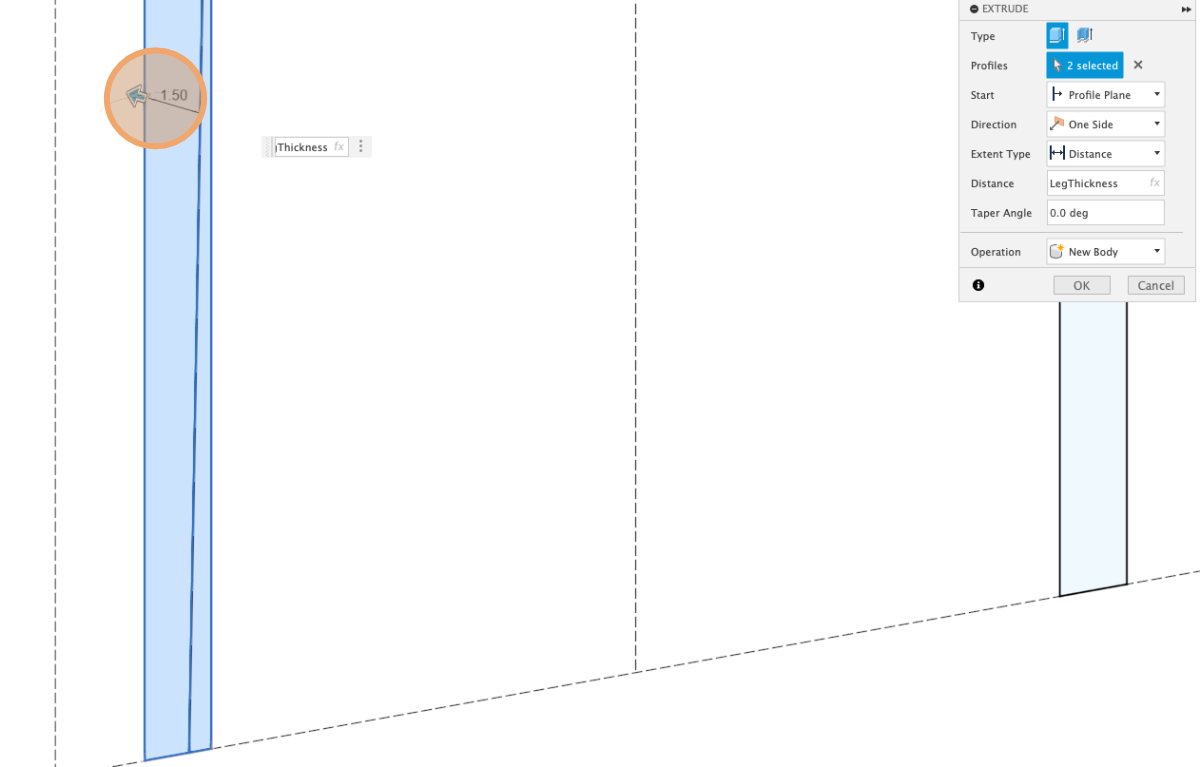
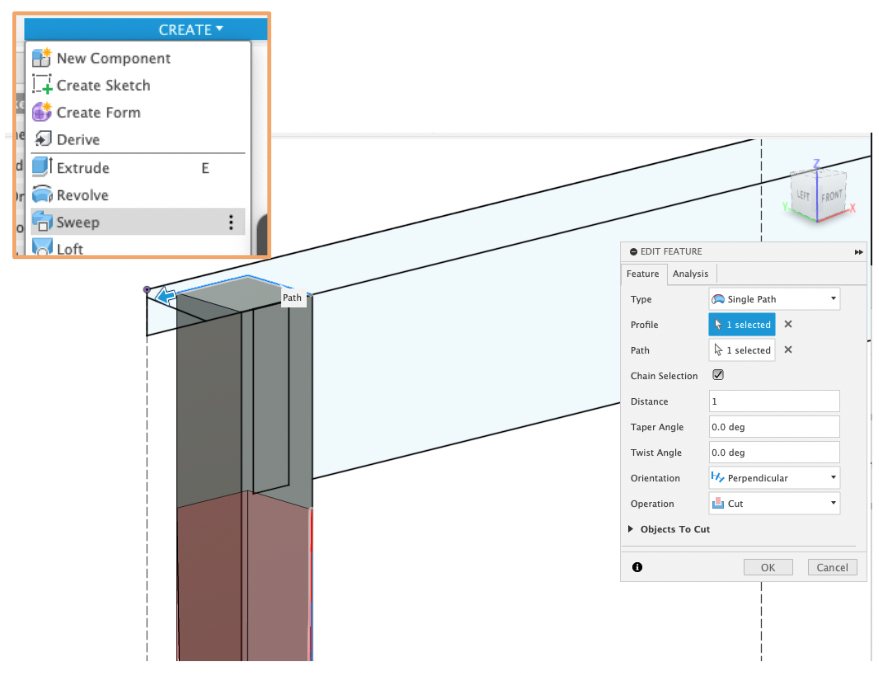
4. Select the tapered section of the sketch. Using the sweep tool in the create menu, select the inside edges as a path to add the double taper.
Extrude the top and apron
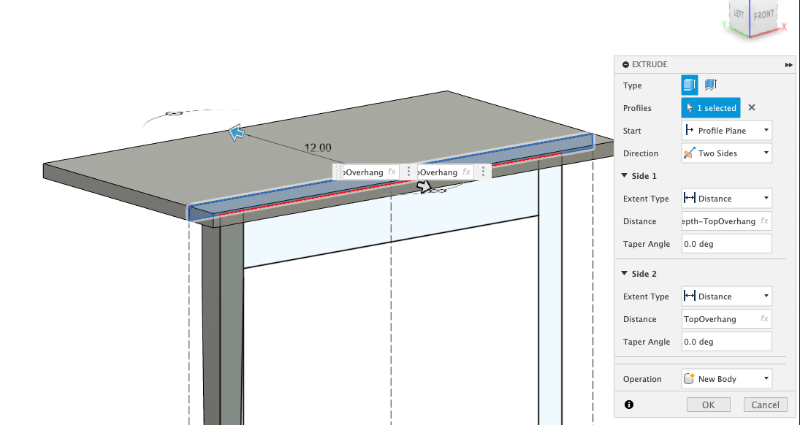
5. Select the top segment in the sketch and perform a two-sided extrusion. Side 2 will have a distance of ‘TopOverhang’ and Side 1 will have a distance of ‘Depth – TopOverhang’.
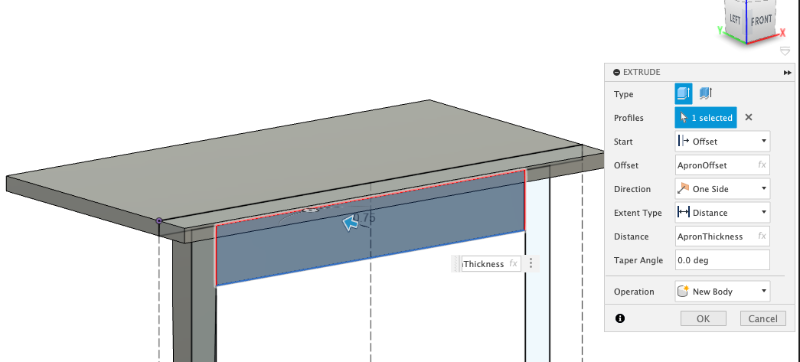
6. Extrude the apron setting the start to offset by ‘ApronOffset’.
Create two midplanes and use the mirror tool to create the rest of the legs and aprons
7. Select the ‘midplane’ tool in the ‘construct’ menu. Using the tool, select both sides of the top to create a midplane halfway from one side to the other.
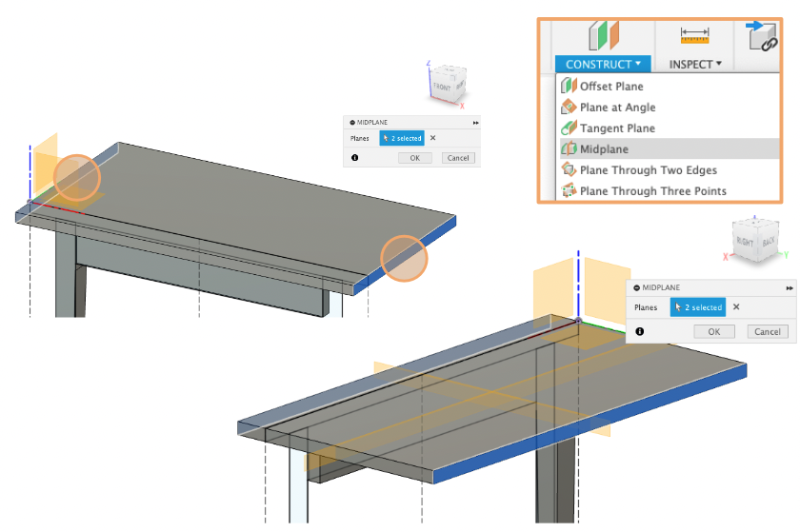
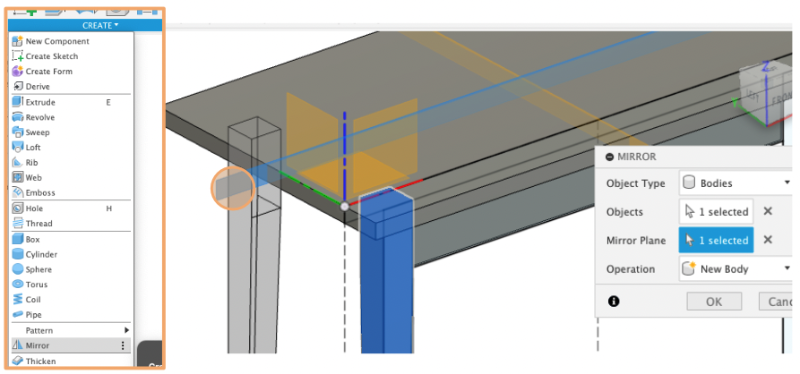
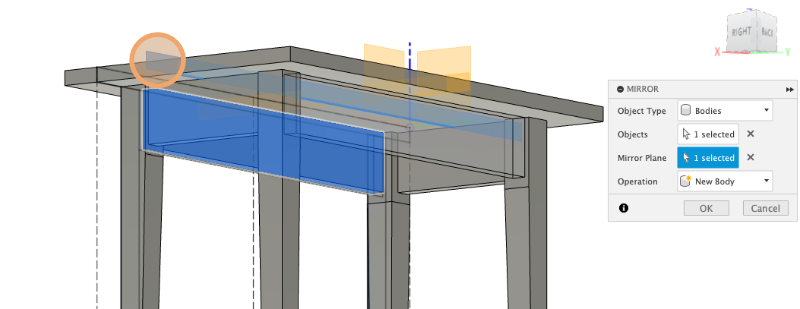
8. Select the ‘mirror’ tool in the ‘create’ menu. Using the tool, select the leg as the object to be mirrored. Click ‘mirror plane’ and select a midplane from which to mirror. Repeat to create the rest of the legs.
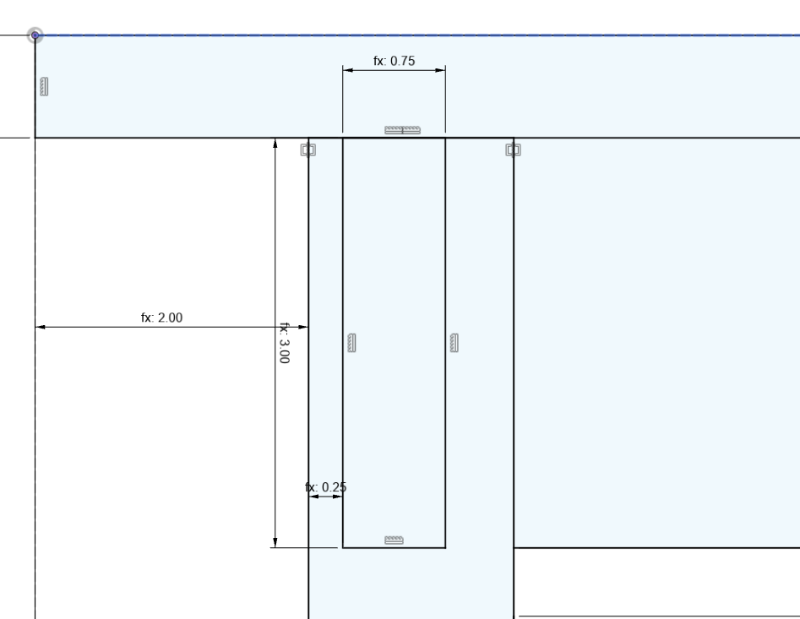
9. Open the sketch. Draw in the side apron Constrain it ‘ApronOffset’ from the side.
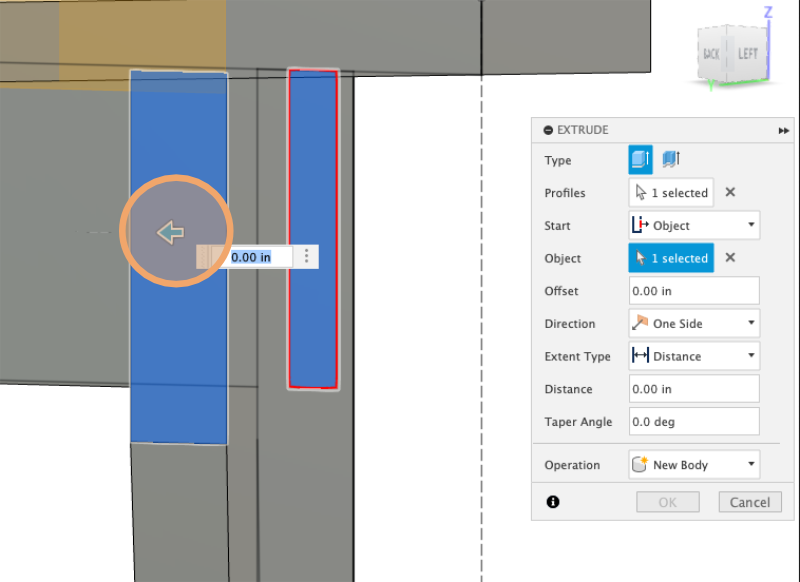
10. Extrude the side apron. Set the ‘Start’ to ‘Object’ and select the inside face of the leg.
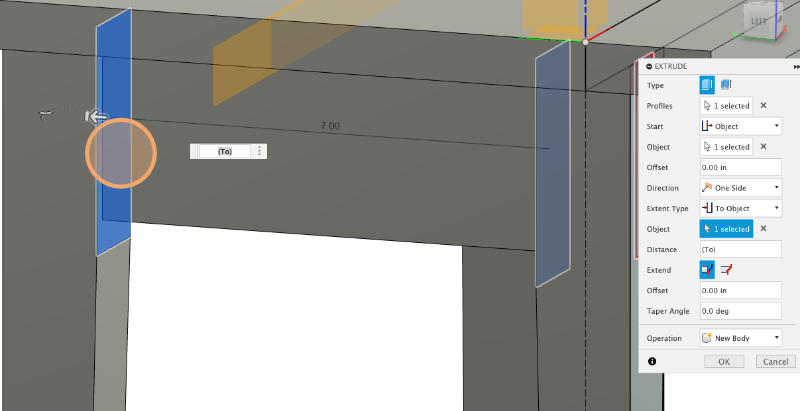
Set ‘Extent Type’ to ‘Object’ and extrude to the inside face of the opposite leg.
11. Create the rest of the aprons using the mirror tool and midpoint planes.
Add the bevel to the top
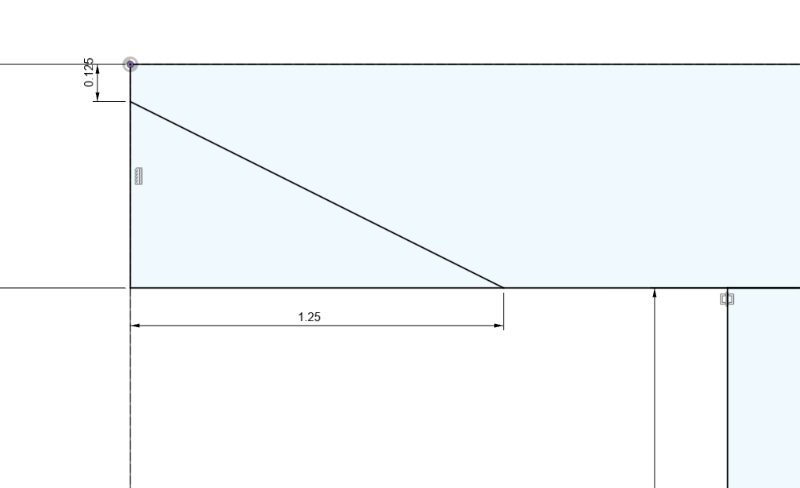
12. Open the sketch and add a bevel to the top. Finish the sketch.
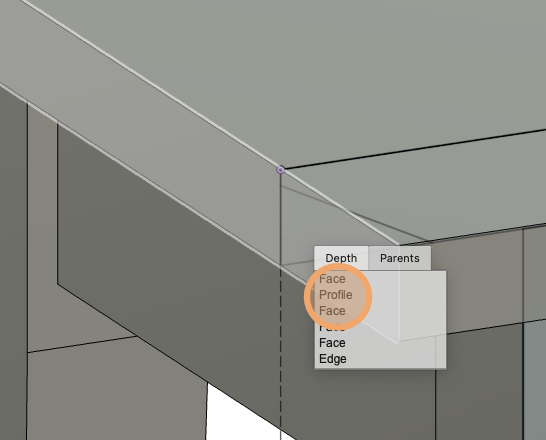
13. Since the sketch element is inside the body, click and hold on it until the menu pops up. Select ‘Profile’.
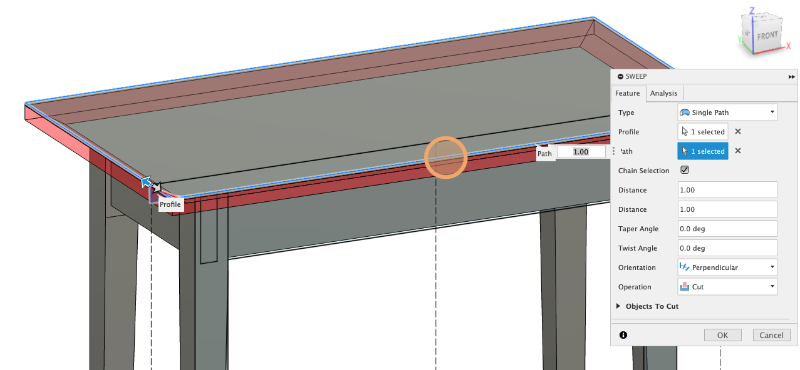
14. Using the ‘Sweep’ tool, select the outside perimeter of the top to sweep the bevel around the whole top.
Woot! You’ve added a back and shelf to the simple cabinet!
